Do you have a clear, repeatable process for welcoming new clients into your business?
For transaction coordinators, a solid client onboarding process is the initial foundation for a successful transaction. In a business where precise communication and clear expectations are everything, an onboarding SOP (Standard Operating Procedure) is the key to maintaining consistency, customer satisfaction, and efficiency.
This guide will walk you through the critical steps of building a client onboarding SOP, designed specifically to help you optimize each stage of your onboarding workflow. To help you get started, we’ve also included a downloadable guide with ChatGPT prompts to create your own customized onboarding SOP.
Why a Client Onboarding SOP Matters for Transaction Coordinators
- Reduces Repetition and Errors: A client onboarding SOP with standardized step instructions helps prevent redundant tasks and errors. By laying out each exact step, TCs can avoid missing critical details and eliminate repetitive tasks that consume unnecessary time and energy.
- Builds Trust with New Clients: Trust starts early in the onboarding workflow. When potential clients experience a consistent and well-organized onboarding process, they’re reassured that the business owner has a structured, reliable approach. This assurance can significantly boost customer satisfaction and reduce initial customer inquiries.
- Supports Quality Control: An onboarding SOP also serves as quality control, setting a high-quality standard for every client’s experience. Detailed documentation and specific steps ensure the onboarding process is not left to interpretation, allowing for consistency that new and experienced employees can easily follow.
- Facilitates Comprehensive Training for New Team Members: A comprehensive onboarding SOP makes training sessions for new hires far more efficient. SOP templates are invaluable for guiding new employees through onboarding, allowing them to take on tasks without constant oversight. This systematic approach ensures knowledge transfer and reduces resource consumption.
- Enhances Client Satisfaction by Aligning Expectations: An SOP helps clients understand what to expect from each step by setting clear timelines, responsibilities, and expectations. This alignment of expectations is key in reducing client complaints, supporting better collaboration among team members, and ultimately creating a more customer-centric approach.
Defining the Scope of Your Client Onboarding SOP
Today, customers are quick to seek alternatives if the onboarding process is overly complex—research shows that up to 74% of potential clients will move on to other options if they encounter friction during this phase.
For transaction coordinators, this highlights the importance of creating an onboarding SOP that’s both straightforward and comprehensive.
A customer onboarding SOP clarifies your entire process, helping to establish a clear path for clients from the start. SOPs’ benefits in this context include a more customer-centric approach and eliminating common issues that lead to delays and misunderstandings.
TCs can offer a smoother client experience by outlining critical steps that avoid excessive backtracking and explaining each procedure with exact step instructions.
Creating a detailed onboarding SOP also aligns the entire team with organizational goals. It provides a framework that new and experienced employees can follow, contributing to a successful business environment where clients are more likely to stay engaged.
Preparing Essential Documents and Materials for Onboarding
A well-organized onboarding SOP starts with having all required documents and materials ready. This preparation step ensures TCs have everything on hand to avoid delays and communicate efficiently with clients.
- Gather Required Documentation: Compile a list of documents and details needed from clients early in the onboarding process. This includes contact information, transaction details, and any necessary agreements. This approach reduces back-and-forth communication and allows TCs to get straight to the task without missing critical information. Organize these documents in a secure location with easy access, and consider using SOP documentation tools or knowledge base software for efficient storage and retrieval.
- Create Client Welcome Packets: A welcome packet is an excellent way to introduce clients to your service and answer potential questions in advance. This packet can include:
- A contact sheet with key team members’ information
- An overview of transaction coordination processes and what clients can expect at each stage
- FAQs that address common issues or queries during the onboarding process
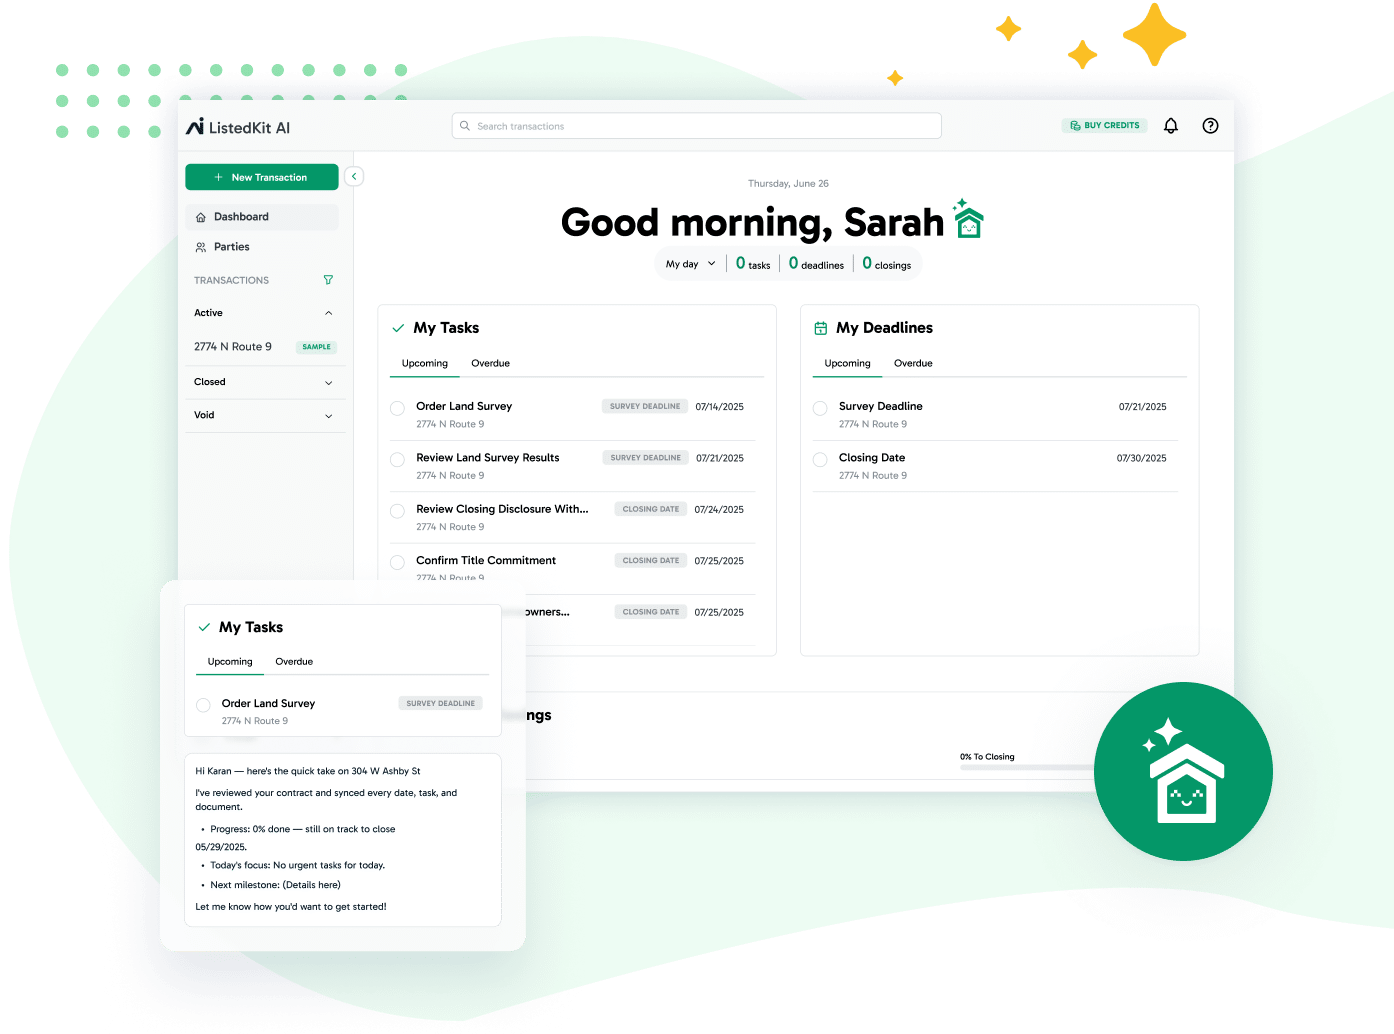
- Documenting Tools for Collaboration: To keep client information accessible and organized, select tools that facilitate file sharing, e-signatures, and secure document storage. ListedKit is an effective tool for these needs, with powerful knowledge base features and workflow capture capabilities that support document management and task tracking.
Step-by-Step Guide to Client Onboarding for Transaction Coordinators
An SOP for onboarding needs to cover every step systematically, ensuring nothing is left to chance. Here’s a breakdown of the client onboarding workflow that TCs can integrate into their SOP template.
- Initial Contact and Communication Setup: Start with welcoming email templates introducing clients to the onboarding process, explaining upcoming steps, and inviting any initial questions. Effective communication helps set the tone for a positive client experience. At this stage, it’s helpful to create a Service Level Agreement (SLA) outlining expected response times, standard procedures, and available communication channels.
- Client Information Intake: Gather important client information using a standardized intake form. This step helps capture client goals, preferences, timelines, and any specific needs for the transaction. Organize this data in a central system for easy access by the entire team, allowing for a cohesive client experience.
- Guiding Clients Through the Tools: Familiarize clients with the platforms they will use during their transaction. Take them through features they will interact with, like viewing transaction timelines or uploading documents, so they’re comfortable navigating the system. This reduces confusion, encourages client engagement, and minimizes customer complaints related to software use.
Tips for Using Automation to Support Your SOP
Automation can turn your SOP into an even more powerful tool by streamlining repetitive tasks and reducing manual effort. Here’s how you can leverage automation to support your onboarding SOP effectively:
- Automate Document Sharing and Reminders: Set up automatic reminders for clients to submit necessary documents or complete essential steps, saving you from having to follow up manually. ListedKit, for instance, offers workflow capture capabilities to automate these reminders, ensuring no step is overlooked and clients remain informed.
- Streamline Task Assignments: With the right tools, TCs can assign onboarding tasks automatically to themselves or other team members, keeping the process smooth and reducing potential delays. Using ListedKit’s workload management features, TCs can easily delegate responsibilities, track task completion, and maintain seamless onboarding experiences across multiple clients.
- Regularly Update Templates: SOPs should be living documents that evolve. Review and update your onboarding templates regularly to reflect changes in your onboarding SOP, client preferences, or organizational goals. By keeping these templates up-to-date, TCs can ensure the onboarding process remains efficient and aligned with high-quality standards.

ChatGPT Prompts to Build Your Client Onboarding SOP
This process will help you build a client onboarding SOP tailored to the unique requirements of your transaction coordination process. Each prompt will guide you through essential SOP elements, including defining the onboarding purpose, documenting communication touchpoints, and setting up automation. Let’s get started.
Step 1: Set the Foundation with Purpose and Scope
Begin by clearly outlining the context and goals of your client onboarding SOP. Setting this foundation helps ChatGPT generate responses that cater to your transaction coordination needs, making it easier to develop a structured and effective SOP.
Prompt:
- “I am a transaction coordinator responsible for managing real estate transactions. I need to create a Client Onboarding SOP to establish a clear, step-by-step process that sets client expectations, ensures a smooth onboarding experience, and aligns with our transaction goals. The SOP should cover each phase, such as initial contact, information intake, document collection, and introductions to key tools.”
Example Result:
Objective
Establish a structured onboarding process to ensure clients understand the transaction coordination journey, what is expected, and how communication will be handled throughout.
Step 1: Initial Contact
- Welcome Email: Send a personalized welcome email within 24 hours of receiving a new client request. Outline what they can expect in the coming weeks and share your contact information.
- Follow-Up Call (Optional): If appropriate, schedule a follow-up call to review the process and address any initial questions or concerns.
Step 2: Information Intake
- Client Information Form: Send a link or attachment for the Client Information Form, covering essential details such as contact information, transaction specifics, and preferences for updates.
- Establish Preferences: Confirm communication preferences (email, phone, or platform) and typical response times to foster timely communication throughout the process.
Step 3: Document Collection
- Required Documents: Email a checklist of required documents, including those needed for compliance, contract review, and any preliminary paperwork.
- Secure Upload Link: Provide a secure, user-friendly document upload link or portal where clients can submit paperwork. Make it clear what each document is for and any deadlines for submission.
- Document Status Updates: Send regular updates to the client as documents are received and verified, ensuring transparency and timely completion.
Step 4: Introduction to Key Tools and Resources
- Tools Overview: Briefly explain key tools you’ll be using (such as ListedKit or any communication portals). Emphasize the convenience of using these platforms and guide the client on accessing or navigating them.
- Resource Links: Share links to user guides or tutorials, if available, for any tools they’ll need during the transaction.
- Portal Setup: If applicable, assist the client in setting up their portal or account, addressing any questions about the process.
Step 5: Wrap-Up and Next Steps
- Summary Email: Once onboarding is complete, send a summary email reviewing the completed steps, documents received, and what they can expect as the transaction progresses.
- Timeline Overview: Offer a brief outline of key transaction milestones and any responsibilities the client will have at each stage.
- Feedback Request (Optional): Encourage the client to share feedback on the onboarding process to help refine future SOPs.
Step 2: Map Out Phases and Timelines
Break down the onboarding process into phases, each with a defined timeline and objective. This ensures clients know what to expect at each stage and when specific steps should be completed.
Prompt:
- “Outline the essential phases in the client onboarding process for a transaction coordinator, including objectives and timeline expectations for each phase (e.g., initial contact, document collection, introduction to tools).”
Example Result:
1. Initial Contact
Objective: Build rapport, outline next steps, and confirm communication preferences.
Timeline: Within 24 hours.
Actions: Send a welcome email with an option to schedule a call.
2. Information Intake
Objective: Gather essential client details for smooth communication.
Timeline: Complete within 48 hours.
Actions: Share a client information form and confirm update preferences.
3. Document Collection
Objective: Collect required documents efficiently.
Timeline: Complete within 1 week.
Actions: Provide a checklist, secure upload link, and confirm receipt as documents arrive.
4. Introduction to Tools
Objective: Introduce necessary tools for easy transaction tracking.
Timeline: Within 3 days of document collection.
Actions: Explain tool functions, help with access, and provide guides if needed.
5. Wrap-Up and Next Steps
Objective: Conclude onboarding and outline the upcoming milestones.
Timeline: Within 2 days post-tool introduction.
Actions: Send a summary email with a transaction timeline and next steps.
Step 3: Prepare Document Templates and Checklists for Each Phase
To streamline the onboarding process, set up templates and client onboarding checklists for each step, ensuring that all necessary information is gathered consistently and efficiently.
Prompt:
- “List the essential documents and checklists needed for the client onboarding process, including contact information forms, document requirements, and templates for initial communications.”
Example Result:
Here’s a list of essential documents and checklists to streamline your client onboarding process:
1. Contact Information Form
- Purpose: Collect basic client details to set up communication.
- Contents:
- Client’s full name, contact number, and email address.
- Preferred communication method and frequency.
- Property details (address, MLS number, etc.).
2. Document Requirements Checklist
- Purpose: Provide clients with a clear list of required documents to avoid delays.
- Contents:
- Signed purchase agreement.
- Disclosure forms.
- Inspection reports.
- Financing documents (pre-approval letter, if applicable).
- Title and escrow details.
- Any specific state-required documents.
3. Initial Communications Templates
- Purpose: Ensure consistent, professional communication at every stage.
- Templates:
- Welcome Email: Outlines your role, sets client expectations, and provides an overview of the process.
- Document Request Email: Details specific documents needed and how to submit them securely.
- Introduction to Tools Email: Briefs clients on key tools (portals, document management systems) and provides setup instructions.
4. Client Onboarding Checklist
- Purpose: Keep track of each step in the onboarding process.
- Contents:
- Initial contact completed.
- Information intake form received.
- Document checklist sent and documents collected.
- Introduction to tools completed.
- Final wrap-up email sent.
5. Transaction Timeline Overview
- Purpose: Provide clients with a timeline of major transaction milestones.
- Contents:
- Key dates (inspection, appraisal, closing).
- Client responsibilities at each stage.
- Notes on contingency periods and deadlines.
Step 4: Define Communication Steps
Define when and how to communicate with clients throughout onboarding to keep them informed and engaged at each stage. This step will help you outline automated and personalized communication strategies to enhance the client experience.
Prompt:
- “Create a list of communication touchpoints for each phase of client onboarding for a transaction coordinator, including specific messages to send and timelines for follow-up.”
Example Result:
- Initial Contact: Send a welcome email explaining the onboarding process and next steps.
- Document Request: Email requesting specific documents with a deadline for submission.
- Follow-Up Touchpoint: Weekly update emails during onboarding, keeping clients informed on their transaction’s progress.
- Platform Introduction: Email introducing the client to ListedKit, with instructions for accessing key tools.
Add these communication steps to your SOP, setting up templates and timelines for each touchpoint. Integrate automated reminders to keep clients engaged and informed without needing manual follow-up.
Step 5: Use Automation for Routine Tasks
Automation is essential for streamlining onboarding tasks and reducing manual follow-up efforts. This step helps you identify tasks that can be automated, allowing you to focus on high-impact tasks.
Prompt:
- “List routine tasks in the client onboarding process that can be automated to save time, such as document requests, follow-up emails, and status updates.”
Example Result:
1. Document Requests
- Automation: Use automated emails or client portals to request specific documents with instructions for secure upload.
- Benefits: Reduces manual email drafting and ensures clients receive consistent, clear instructions.
2. Follow-Up Reminders
- Automation: Schedule reminders for clients to submit documents or complete information forms if they haven’t responded.
- Benefits: Keeps the process moving smoothly without needing manual check-ins.
3. Status Updates
- Automation: Send automated notifications when documents are received, verified, or missing.
- Benefits: Provides transparency, so clients feel informed without additional workload.
4. Introductory Tool Access
- Automation: Generate emails with login details and setup guides for any portals or tools clients will use.
- Benefits: Eases clients into the tools they’ll need without one-on-one guidance.
5. Timeline Overviews and Key Date Reminders
- Automation: Schedule reminders for critical transaction milestones, like inspections, appraisals, or closing dates.
- Benefits: Keeps clients on track with minimal intervention.
6. Client Intake Form Completion
- Automation: Use a digital intake form that automatically collects and organizes client information upon submission.
- Benefits: Streamlines data collection and ensures no information is overlooked.
7. Initial Communication Templates
- Automation: Set up templates for the welcome email, document request, and initial instructions, triggered at specific onboarding stages.
- Benefits: Saves time on repetitive tasks while maintaining a professional, consistent experience.
Incorporate these automation steps into your SOP to minimize manual tasks and improve efficiency. Tools like ListedKit offer workflow features for effectively setting up and tracking these automations.
Take the Next Step: Start Building Your Onboarding SOP
A structured onboarding SOP simplifies client onboarding, saving hours of manual work while improving client satisfaction and communication.
Following the steps above and using the ChatGPT prompts, you can build an onboarding SOP that aligns with your goals and elevates your client experience.
Tools like ListedKit make automating parts of your onboarding workflow easier, letting you focus on delivering exceptional service rather than repetitive tasks. Start refining your SOP today to create a predictable, professional onboarding experience for every new client.


