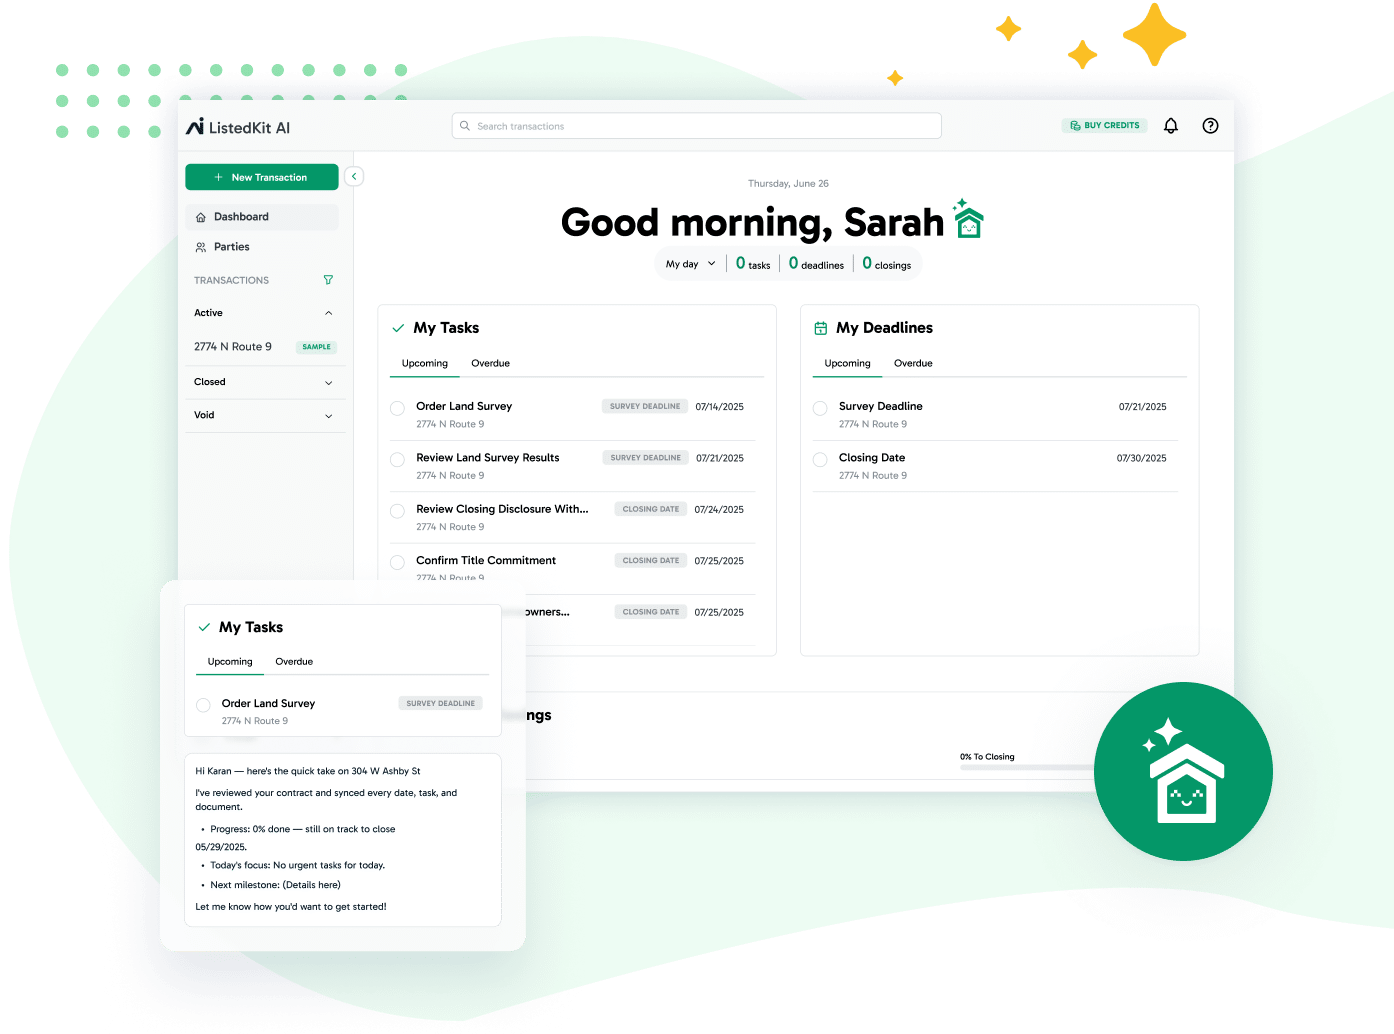
As Transaction Coordinators grow their businesses, one thing becomes clear fast: organization and professionalism can’t be optional. Especially when you’re supporting multiple agents, teams, or brokerages, you need a system that adapts to your workflow — not the other way around.
That’s why we’re excited to introduce Teams — a new feature in ListedKit designed to help you segment your work, personalize the experience, and scale with confidence.
What is the Teams Feature?
The new Teams feature in ListedKit gives you the ability to group agents, clients, and transactions under dedicated “Teams” — each with its own optional branding, such as a custom logo and contact information.
This means that if you’re working with multiple brokerages or teams, you can now keep their work distinct, visually branded, and easier to manage.
Here’s What You Can Do With Teams
Organize Work by Team or Brokerage
Create separate teams inside your ListedKit workspace to keep agents, clients, and transactions grouped by the brokerage or team they belong to. Each Team gets its own dashboard, so you always know where everything lives.
Brand the Agent and Client Portal
Upload a custom logo for each Team so your clients and agents see their brand reflected in their experience. This small detail goes a long way in building trust and delivering a polished, professional impression.
Stay in Control With Global and Team Views
You can still view all agents, clients, and transactions globally across your account, while also diving into team-specific dashboards when needed. Think big picture and granular control — all in one place.
Set Smart Defaults
Choose a default Team in your settings so new transactions, clients, or agents are automatically assigned — helping you save time during busy weeks.
Why it Matters
Transaction Coordinators are doing more than just paperwork — they’re running businesses. With the Teams feature, we’re making it easier for you to:
- Scale your business across multiple clients
- Deliver a seamless, branded experience for each one
- Reduce errors and confusion with organized team views
- Present yourself as the professional you are
How to Set Up a Team in ListedKit
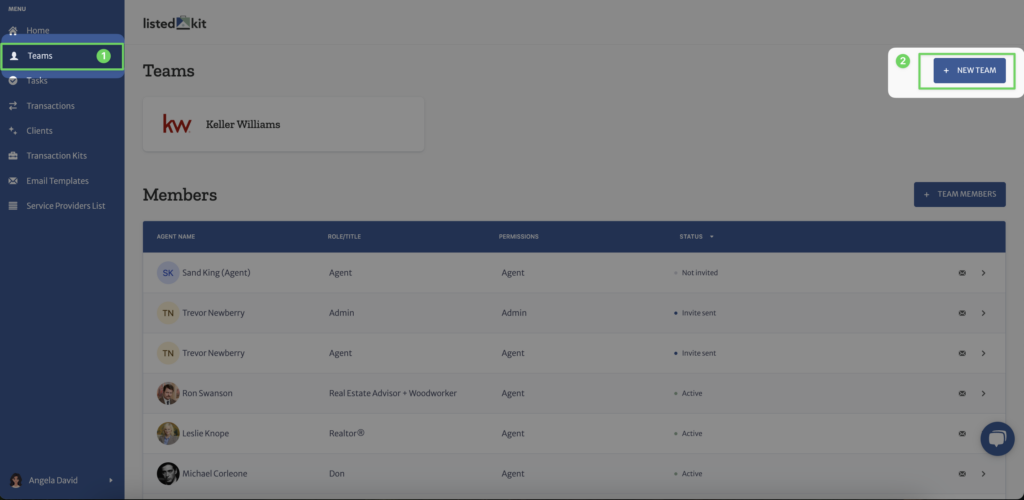
1. Navigate to the Teams Menu
Go to the Teams section from the main menu and click Create Team.
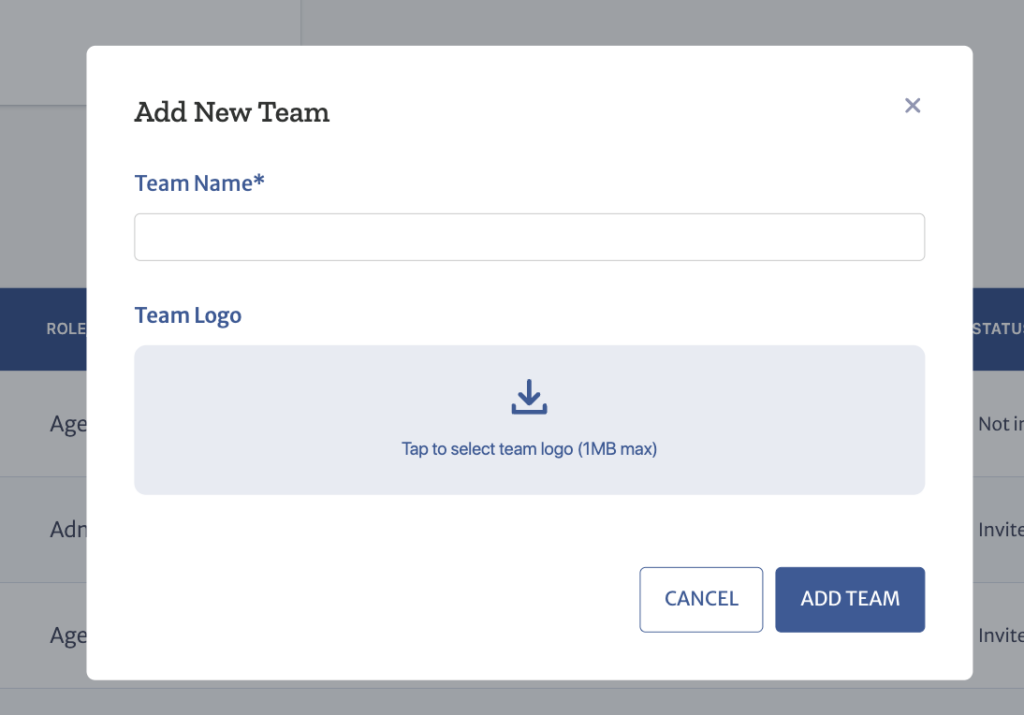
2. Add Team Details
Enter a Team Name and upload a Team Logo. Note: This logo will appear in the client portal for any buyers or sellers working with agents on this team.
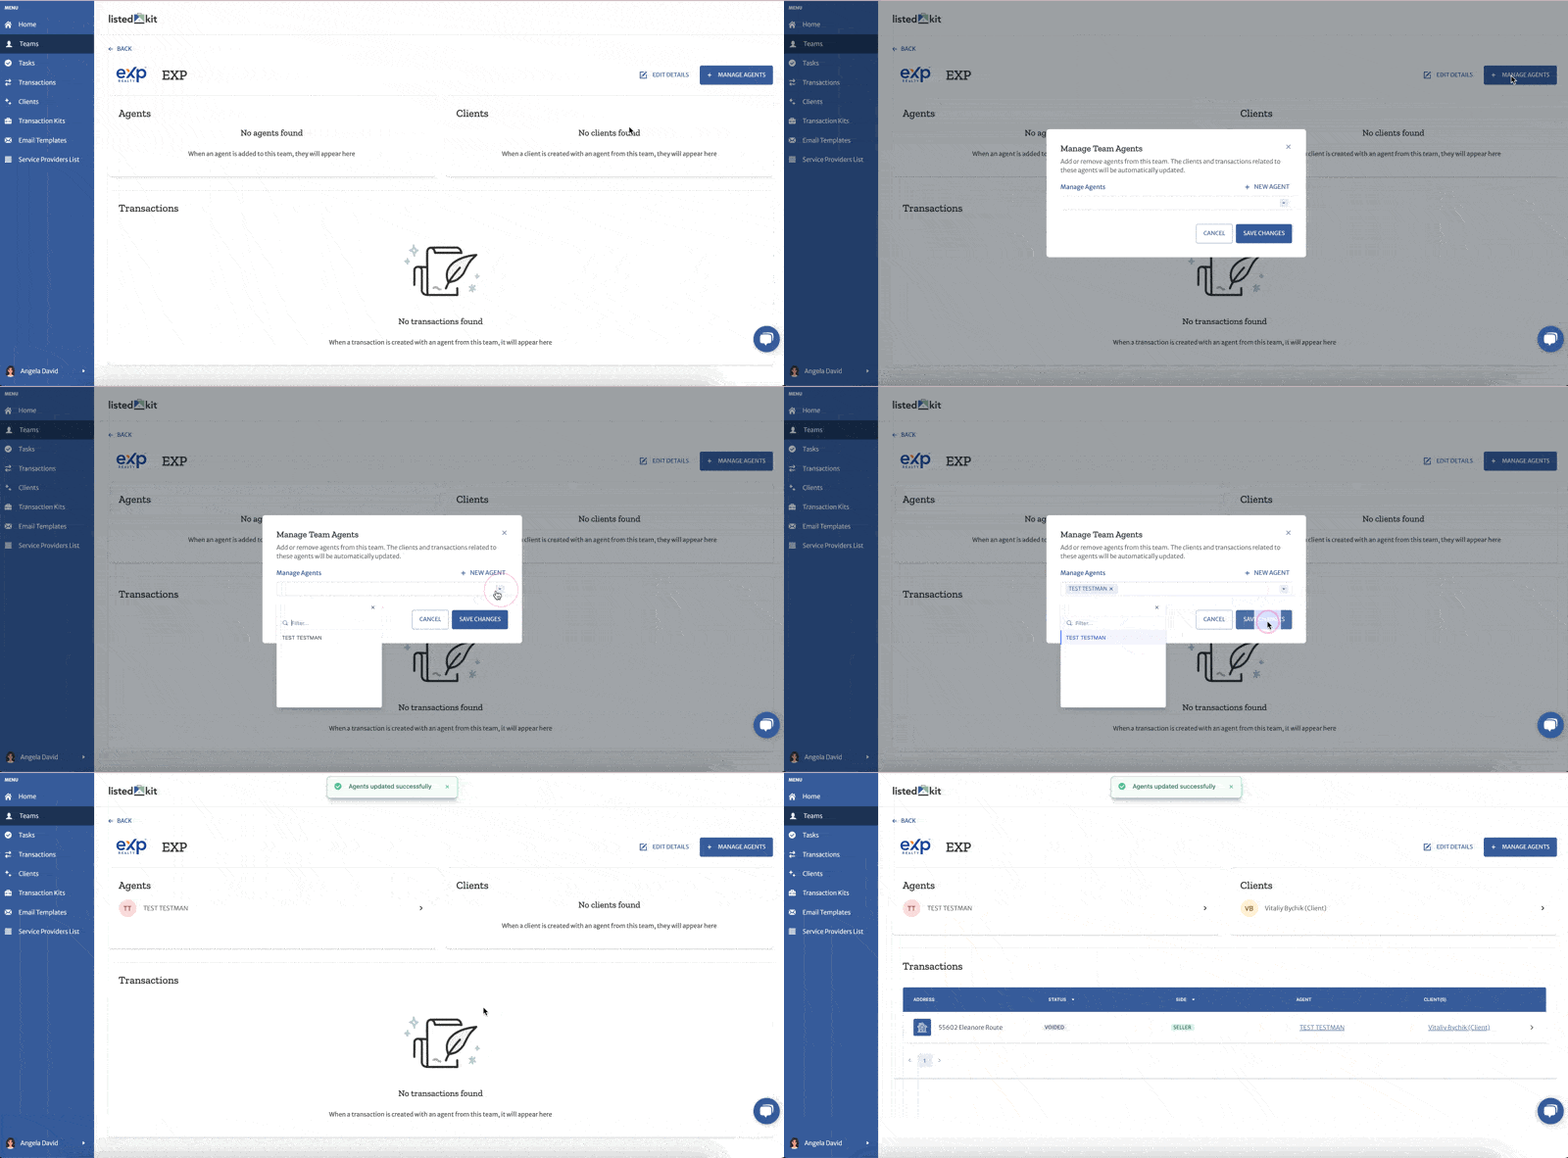
3. Manage Team Members
From here, you can add or remove agents as needed. Once agents are added, their associated clients and transactions will automatically appear under the team’s dashboard.
Ready to get started? Go to the ListedKit App and set up your first team.
What’s Next
The Teams feature is just the beginning. We’re working on more team-level settings to help you customize workflows, permissions, and communication preferences — so stay tuned.
Not using ListedKit yet? Learn more about how we’re helping TCs scale with structure.

